This month was my little girl's 3rd birthday and part of her gift was a new baby doll that she named "Sari". Being the mama in me, I made my little girl's doll some tiny baby doll clothes, crocheted hats, and a baby doll carrier. Because, you know, they love to take their little baby doll with them wherever they go. Or when they play at the park and they climb around and stuff. Plus, a baby doll in a baby doll carrier is way too cute not to use one. Don't you agree?
Today's DIY is not really a step-by-step tutorial because, like I always say, you can find tons of tutorials online now like on Pinterest. In fact, that's where I found the design of the baby doll carrier. Yaye to Pinterest, again! I actually made own pattern to this, and I just use my little girl's doll to decide the size that I want for the carrier, using the design I found online. Thank you to whoever first came up with this design. This DIY Baby Doll Carrier is so simple to make that I think even a beginner can do it.
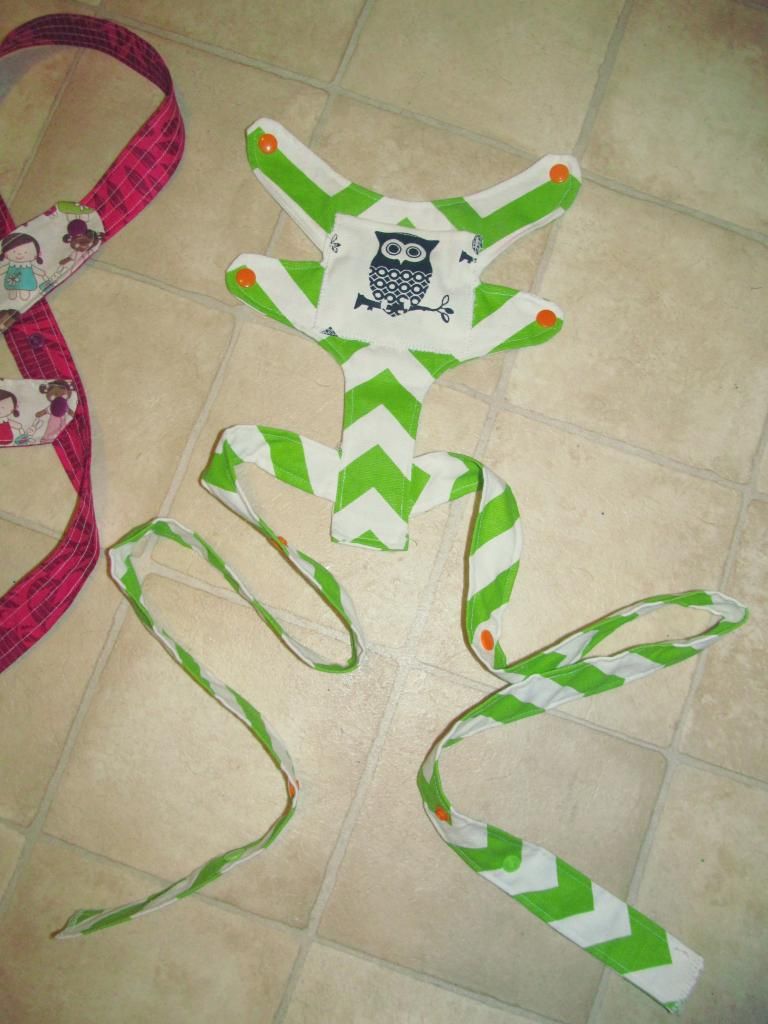
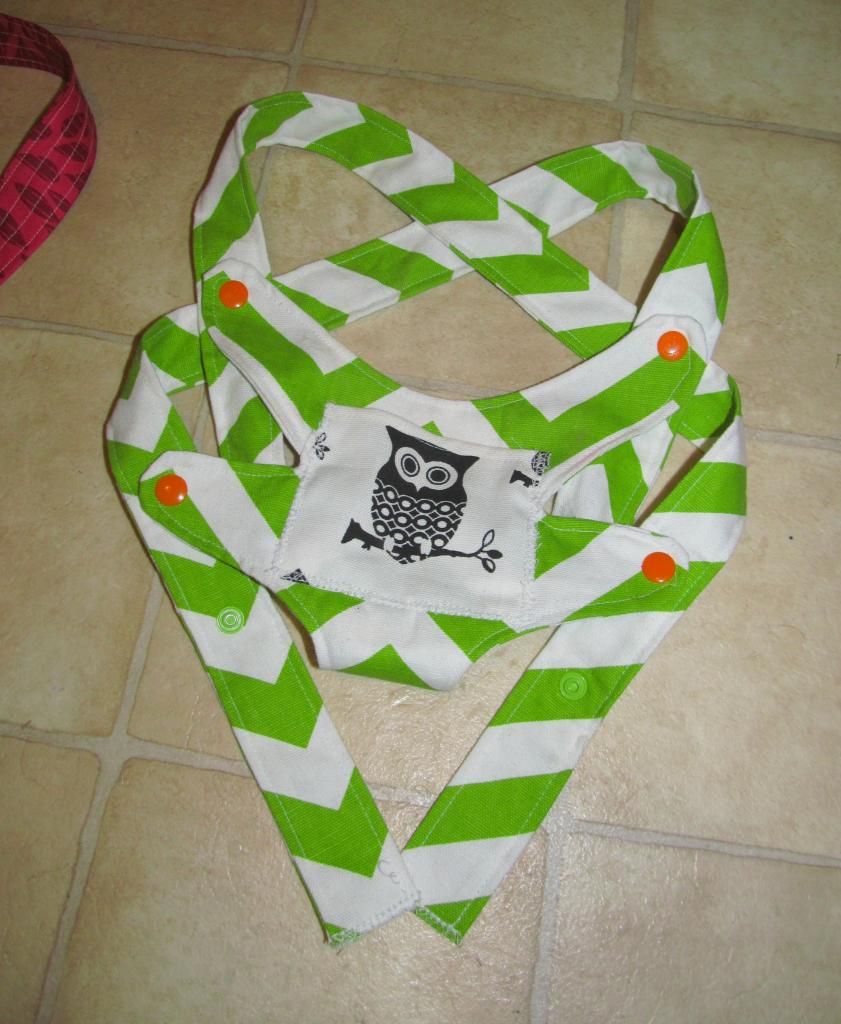
Since my little girl won't be carrying a really heavy baby doll, I used the snaps to attach the straps together. I have tons of snap left from when I used to make our own cloth diapers, so I use them in a lot of my projects from making my girl's clothes to making the carrier. Snaps are easy to install and easy for the little kids to use. But if you decide to make your own carrier, please feel free to use whatever you want.


My little mama and her new baby Sari. I don't know where she came up with that name, but that's what she told us. I wish I had made the front owl pocket bigger to fit the baby bottle, but she told me it was okay because it can fit the little pink baby blanket.


Do they look alike now?

All covered in Chalk Powder.
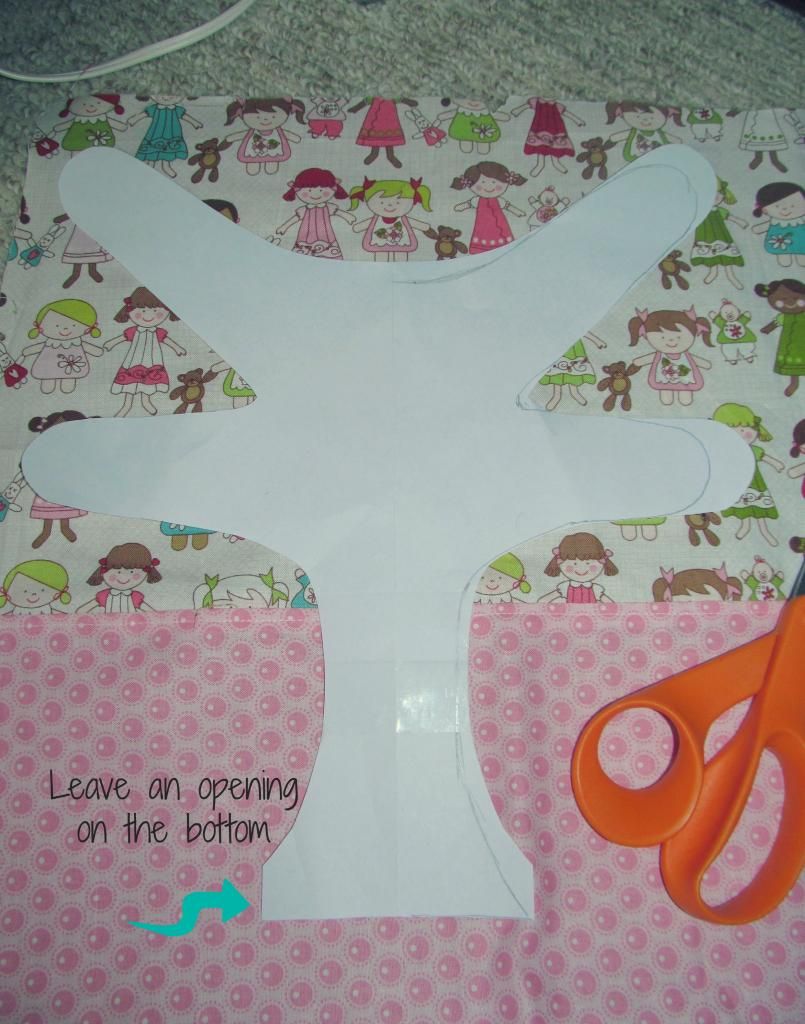

- I made my own little pattern from two art papers that I taped together. You can use a newspaper too, or whatever paper you have available.
- Cut two of these in the fabric you want for the front and the back piece of the carrier.
- Sew the sides of the two fabrics together, right side facing each other, except leave the bottom open, so you can flip your fabric right side out later on. And the bottom part is where you stitch your straps as well.
- When making your straps, all you do is cut a long strip of fabric, to the width and length you need. Attach the straps to the bottom of your carrier and you have your almost finished carrier. The last thing to do is attach the straps or Velcro, and your carrier is done! I told you it was easy!
(As you can see in the picture below, my straps are attached to the side because I made a mistake when I first made my pattern. My straps are wider than the bottom of the carrier. That is why on my pattern above, the bottom is wider so I could stitch my straps together and not to the side. It still works though).


Baby doll carrying is a serious business. Didn't I say it comes in handy when climbing?
I like the baby doll carrier so much that I thought of making another one for my little girl's friend. She too has her own baby doll and I see her carrying it everywhere she goes, that I thought she could surely use one. We are crossing our fingers and toes she will love it.


This one is for a friend. I really wish I had some really cute fabrics left, but I don't have anymore, so I hope this one is cute enough.

Next time on the DIY part, I am going to show you a few of the baby doll clothes I made. And maybe this time I will have a step-by-step tutorial on how to make an easy baby doll dress. What do you think?
Let me know if ever you are making one or have made one and share us your photos on our Facebook page: Chetopian Family. Have a great one! And Happy Thanksgiving, America!
Let me know if ever you are making one or have made one and share us your photos on our Facebook page: Chetopian Family. Have a great one! And Happy Thanksgiving, America!
LOVE it! And she can wear it on her back too! I made a mei tai for my neice and her baby. So fun!
ReplyDeleteThis is adorable! My daughter would love a baby carrier like this!
ReplyDeleteHow cute! Sadly none of my kiddos liked dolls.
ReplyDeleteSuper Cute. My 3 year old would love to carry around her dolls with this carrier.
ReplyDeleteso adorable!! love the climbing pic hihihih. Oh you are so brilliant with your crafts. keep it up!
ReplyDeleteWhat a sweet way for your little one to carry baby. My DIL carries her little one around, I think this would be a great gift to get the baby too (she's 1 1/2...so maybe baby isn't the right word, but she's still a wee one). I bet everyone would love it!
ReplyDeleteThis is a super cute doll carrier! What a great idea!
ReplyDeleteADORABLE! I have some moms in my life who would LOVE these - now to test my skills. haha
ReplyDelete